


In 2014, a platform was released to allow users to upload static websites and host them on their servers for free. The service was called MakerLoop, and it seemed like the best choice for people who just needed a simple hosting and storage service. By 2022, Netlify (rebranded from MakerLoop) will be serving more than 600 thousand websites on the Internet and is still free (at least most of the time).
](https://cdn-images-1.medium.com/max/2882/1*2xUF8EkFLwWgjtAs59GG8A.png)
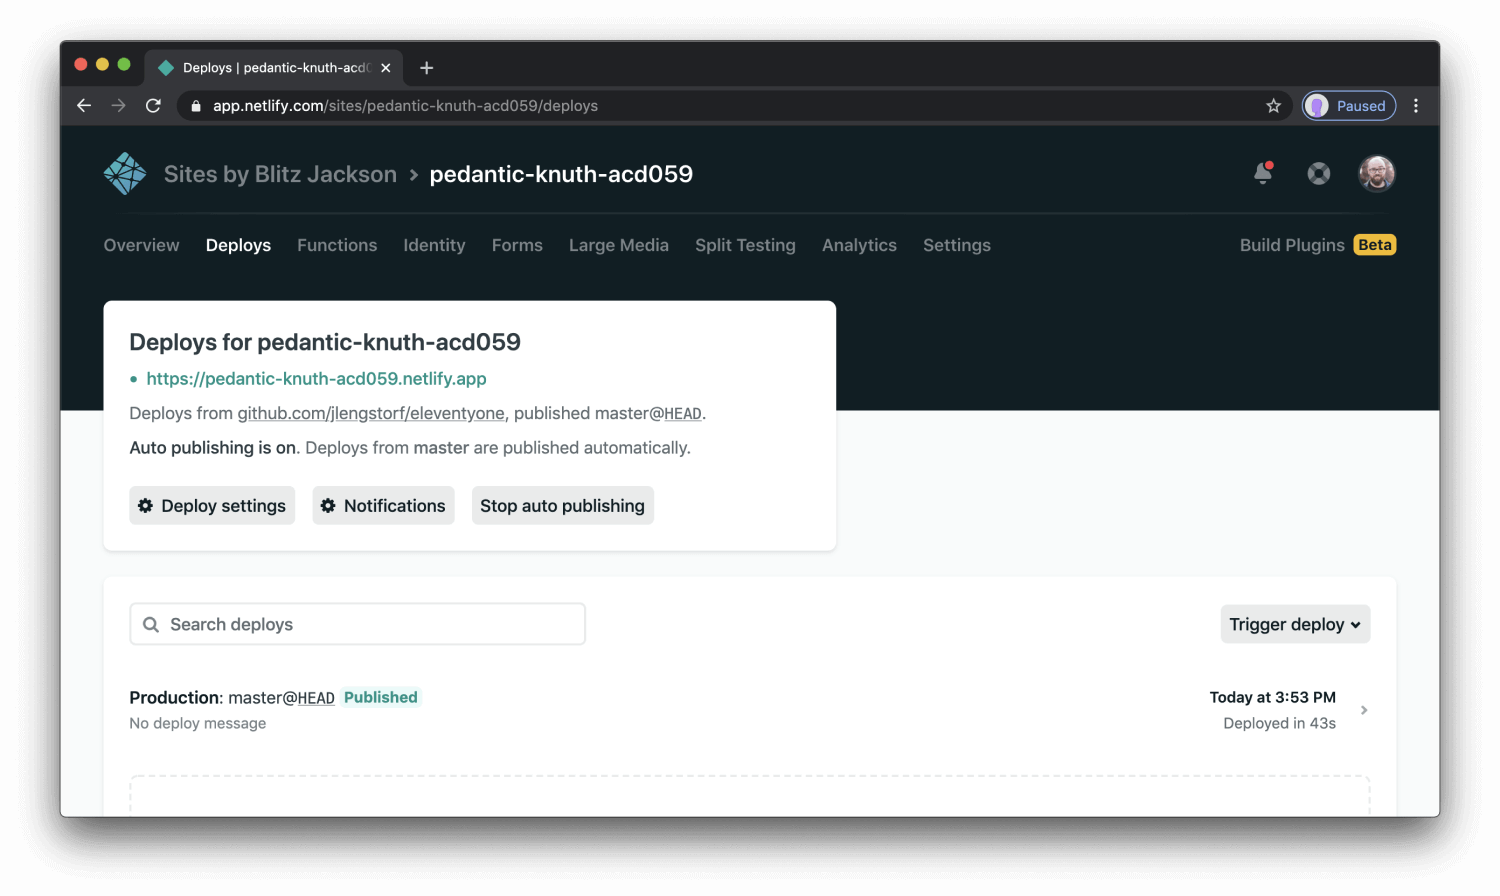
You might find that Netlify has undergone a lot of changes since conceptualization. The platform and strategies behind it have changed significantly over time. For example, there is a change in the way you integrate it with GitHub to easily develop the website and its future versions. It’s great for development and deployment, but it doesn’t include testing. Even if your web application stands on robust Netlify pillars, you still need to test it for visual elements to ensure a unified experience across all devices.
This post on Netlify Testing aims to discuss the changes Netlify has undergone and how it makes hosting a website so easy to use. In addition, we will look at Netlify’s features and how we can perform visual tests on the hosted websites.
Hey! Are you interested to know about the browser compatibility of CSS font-display? It shows a browser compatibility score of 85. Before a downloadable font is loaded and rendered on screen, the font render settings dictate how the font renders before it is fully loaded.
What is Netlify? — A brief introduction
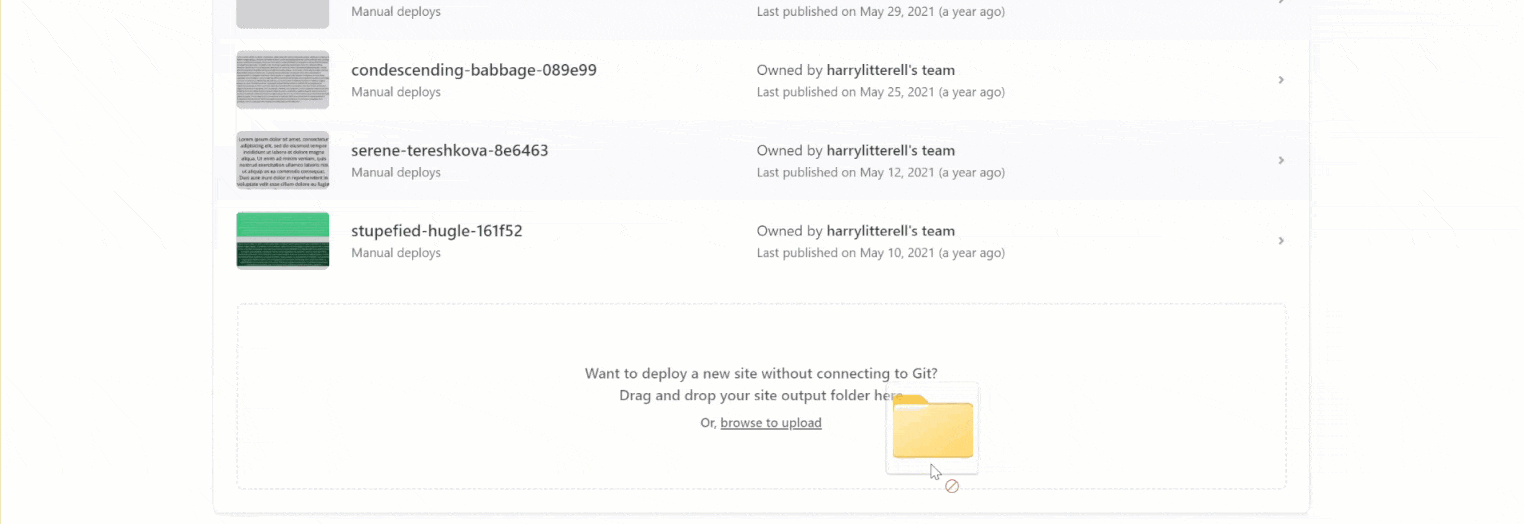
Netlify is a cloud-based platform that makes it super convenient for users to deploy and host their websites. If you are looking to host a static website, I have found Netlify to be the best option over the internet. The below GIF shows how easy it is to upload and host a website on Netlify:
Due to its easy usage and the type of applications hosted, Netlify was responsible for coining the term JAMstack (now written simply as Jamstack). Gradually, Jamstack picked up, and people applauded its method of using the application’s logic on the client-side rather than the server-side. As a result, today, Jamstack is a popular application design and sometimes preferable for an easily decoupled website that is easier to maintain and puts a lesser load on the server.
The latest advancements in Netlify
Netlify started as a static application hosting platform, and soon enough, developers realized that they required a lot more than hosting static pages. To cater to their needs, Netlify expanded its functionalities over two significant areas:
GitHub deployment
Serverless computing
Netlify CMS
GitHub deployment
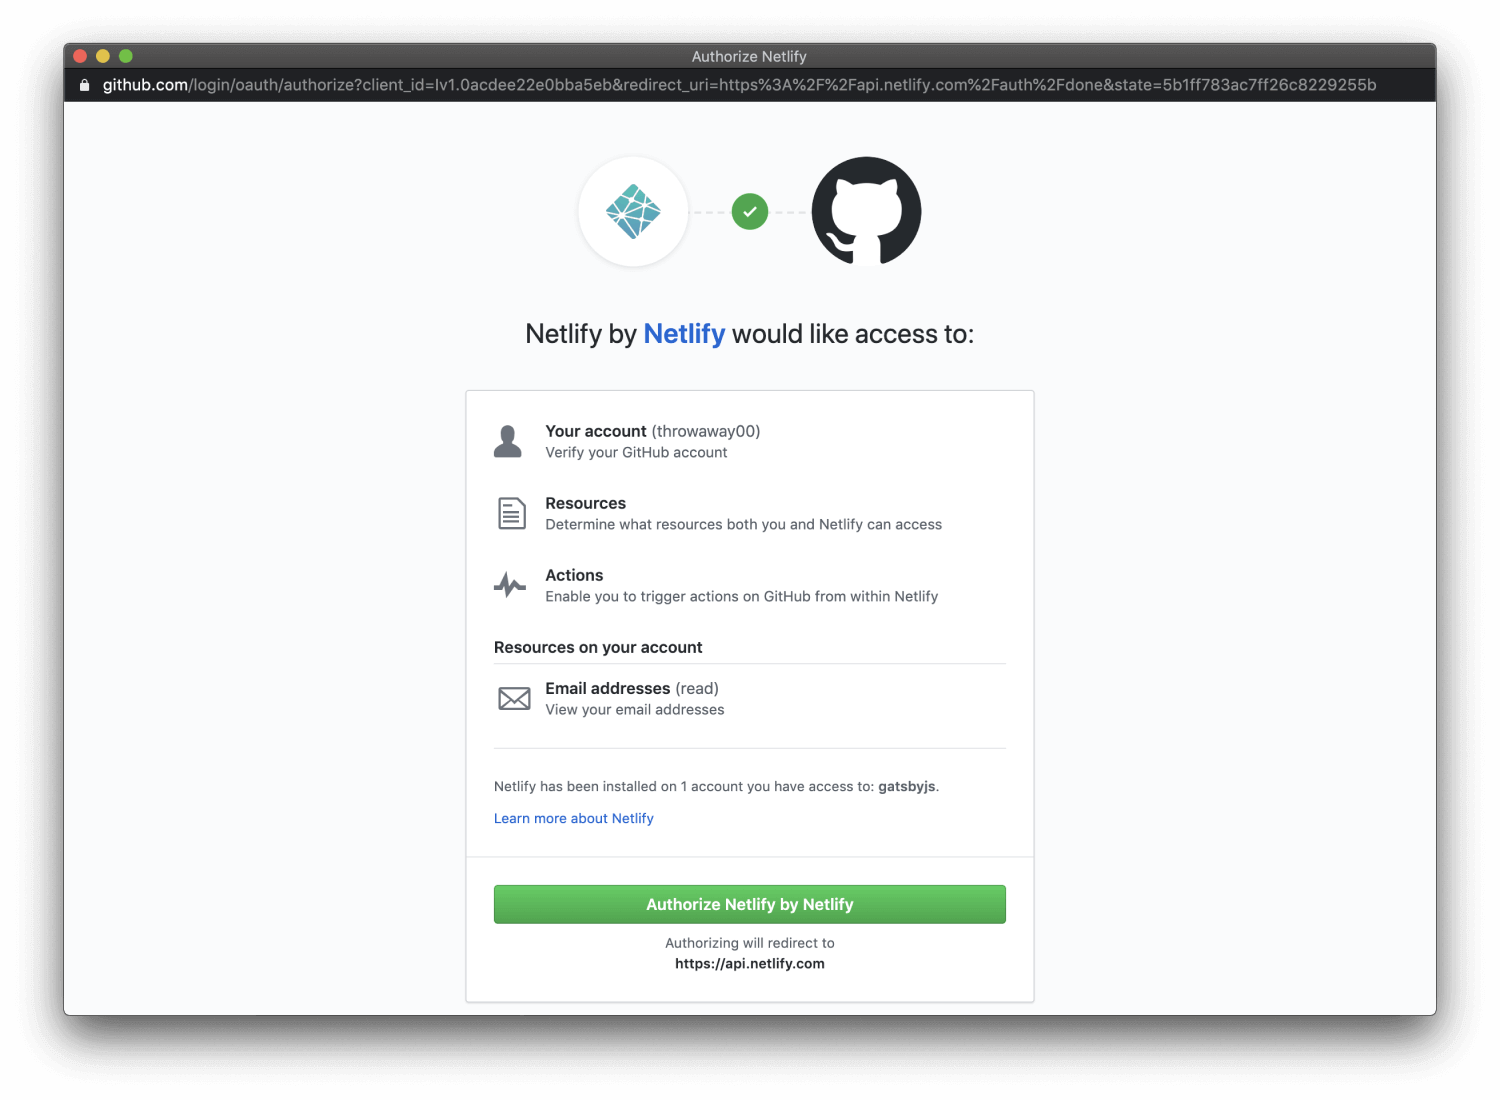
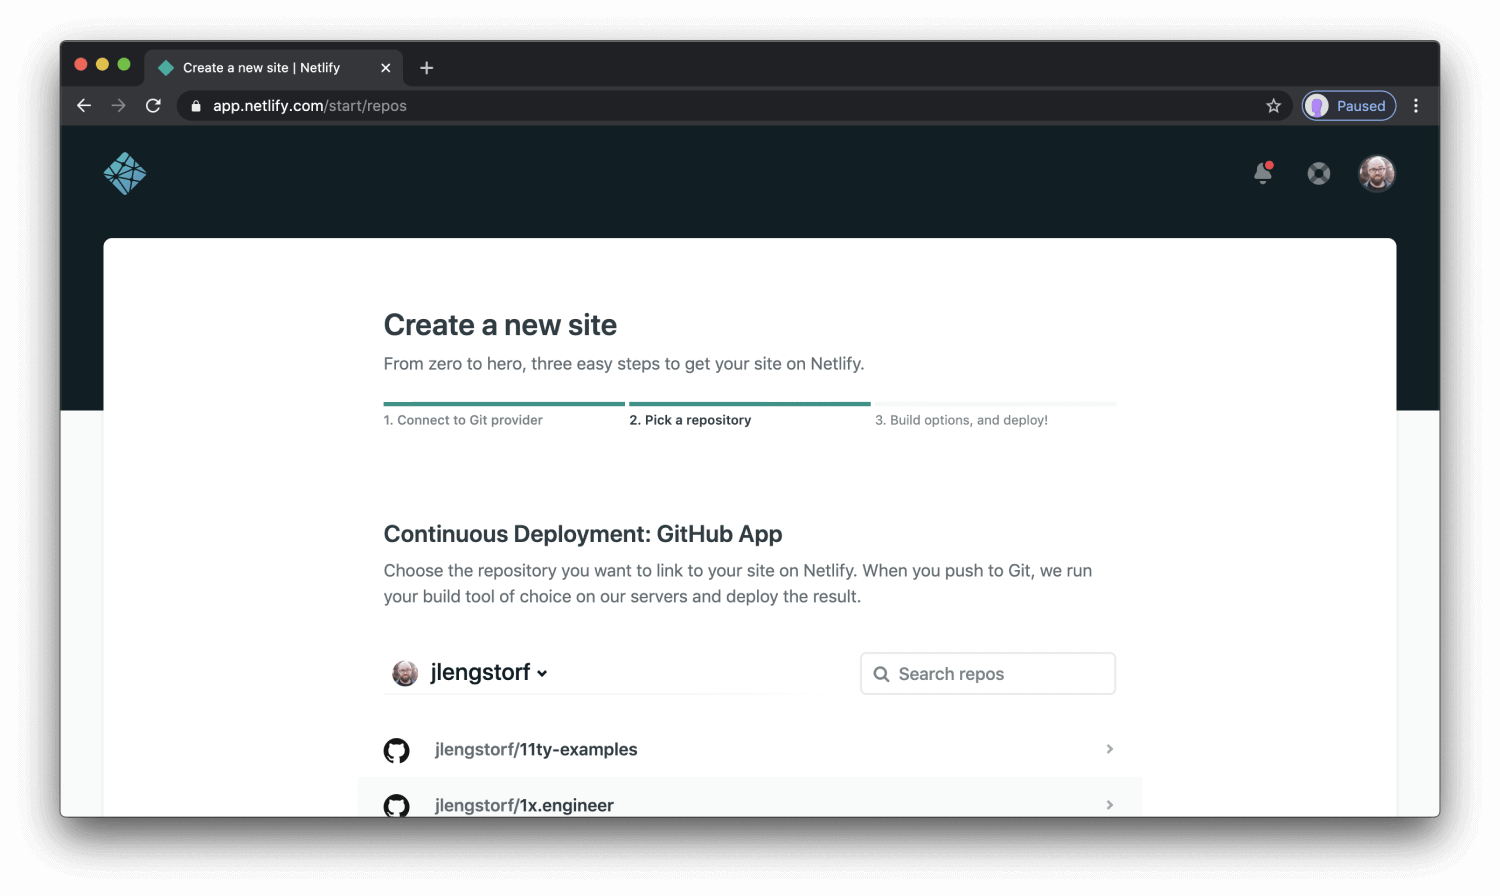
In 2016, Netlify introduced GitHub based deployment for your static web applications. Once you connect your GitHub repo to Netlify, you can deploy the subsequent version changes, which are automatically deployed to your live Netlify website.
To achieve this, follow the below steps:
1- Create a new site in Netlify.
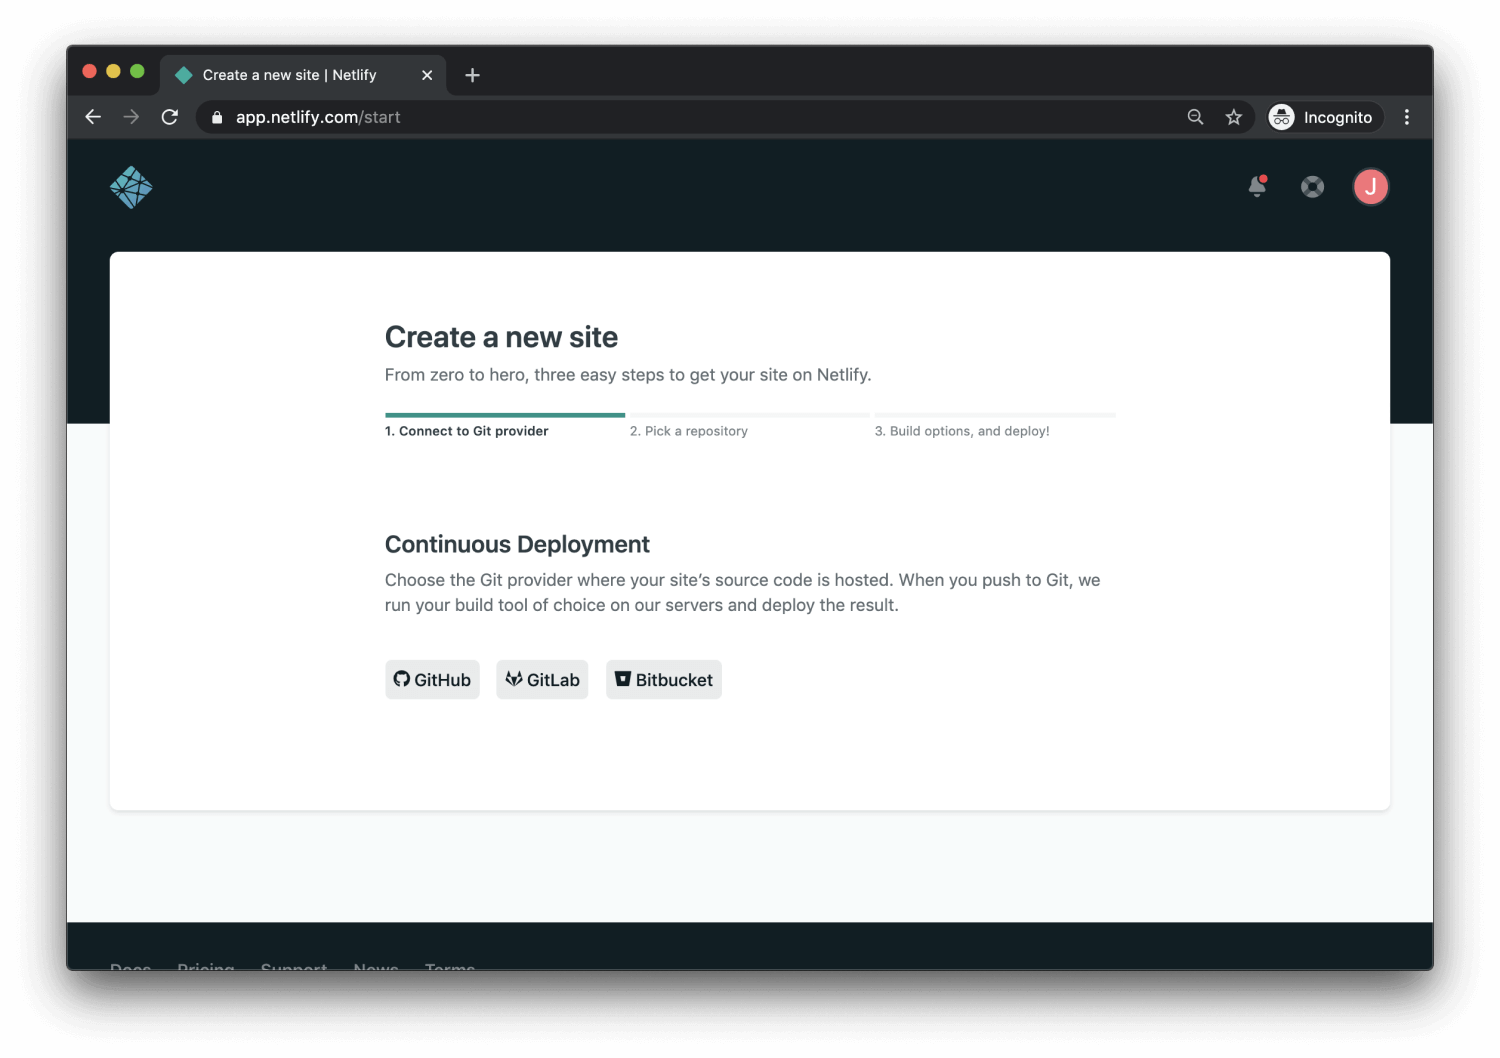
2- Authorize Netlify to fetch your data from GitHub.
3- Select the repository you wish to connect to for conducting Netlify testing.
4- Configure a few settings as per requirements.

5- Once done, your website will be connected and deployed successfully.
Netlify Serverless
The world of serverless is not unknown in the web development world. The process of computing the server-based code without maintaining a server is easy to manage. Netlify has also expanded its wings into serverless codes with its separate section called “Netlify Functions”.
With “Netlify serverless” the backend code is converted into the API endpoints. You can use it to fetch or retrieve data to the application’s front-end. These endpoints can also be used to run background calculations or run automatically to event responses for Netlify testing.
An example:
const fetch = require("node-fetch");

    const API_ENDPOINT = '[https://cat-fact.herokuapp.com/facts'](https://cat-fact.herokuapp.com/facts');

    exports.handler = async (event, context) => {
      try {
        const response = await fetch(API_ENDPOINT);
        const data = await response.json();
        return { statusCode: 200, body: JSON.stringify({ data }) };
      } catch (error) {
        console.log(error);
        return {
          statusCode: 500,
          body: JSON.stringify({ error: 'Failed fetching data' }),
        };
      }
    };
Here, a simple JS code can help create an endpoint for our serverless queries.
Netlify CMS
Netlify CMS is an open-source content management system that works according to the headless architecture. Netlify CMS can be connected to your version control systems such as GitHub or GitLab and takes the data from it automatically. It is also to be noted that Netlify works great with Netlify CMS but is not restricted just to this. You can use Netlify CMS without Netlify and vice versa.
Along with a front-end with an intuitive user interface to manage your content on Netlify CMS, it also comes with other Netlify powered functions for making deployment and management easier. It might be one of the best tools when you want to manage your content through a version control system without writing code or learning anything about the VCS you use.
Netlify powered popular websites
These popular websites in use today are deployed using Netlify and Jamstack.
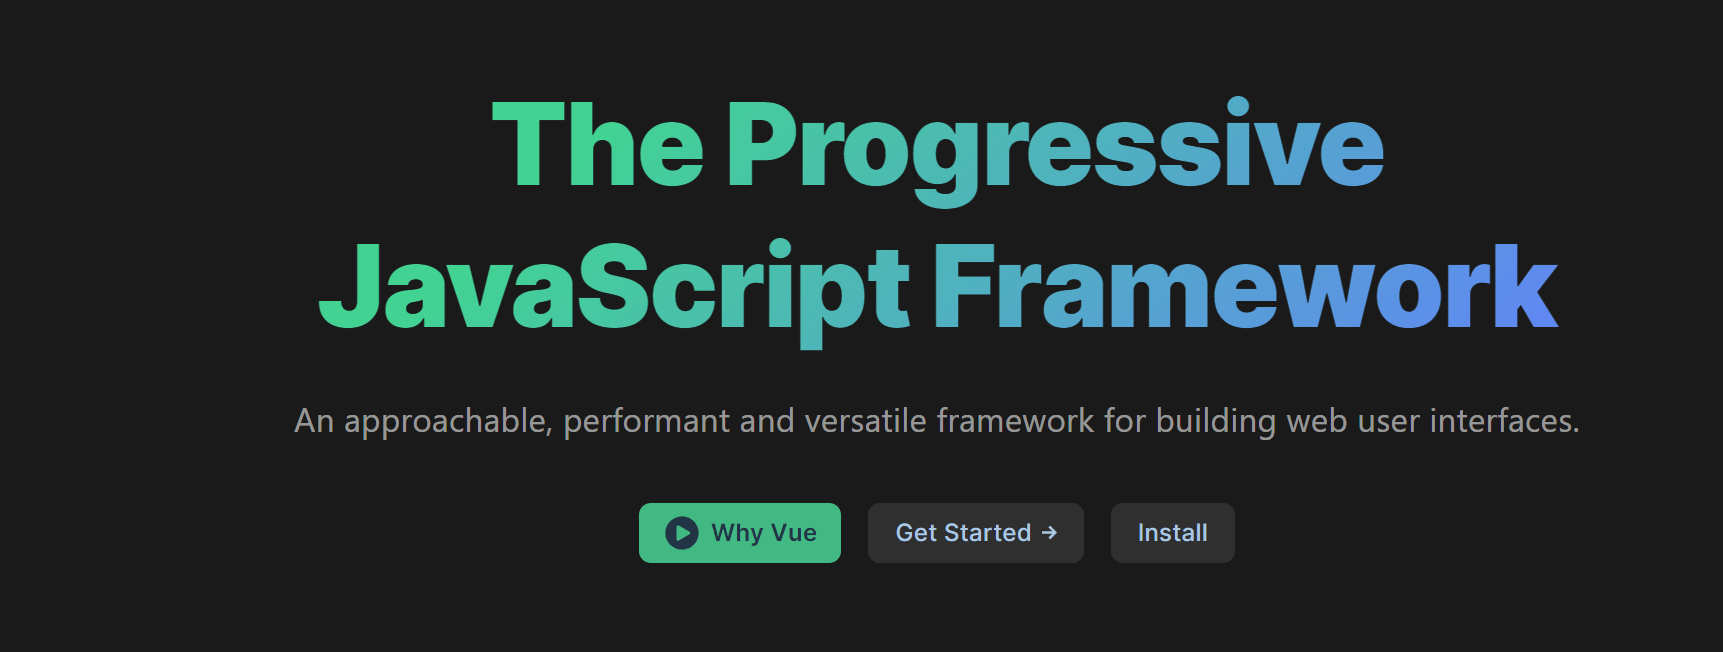
Vue
Popular JavaScript framework Vue has launched its official website using Netlify.
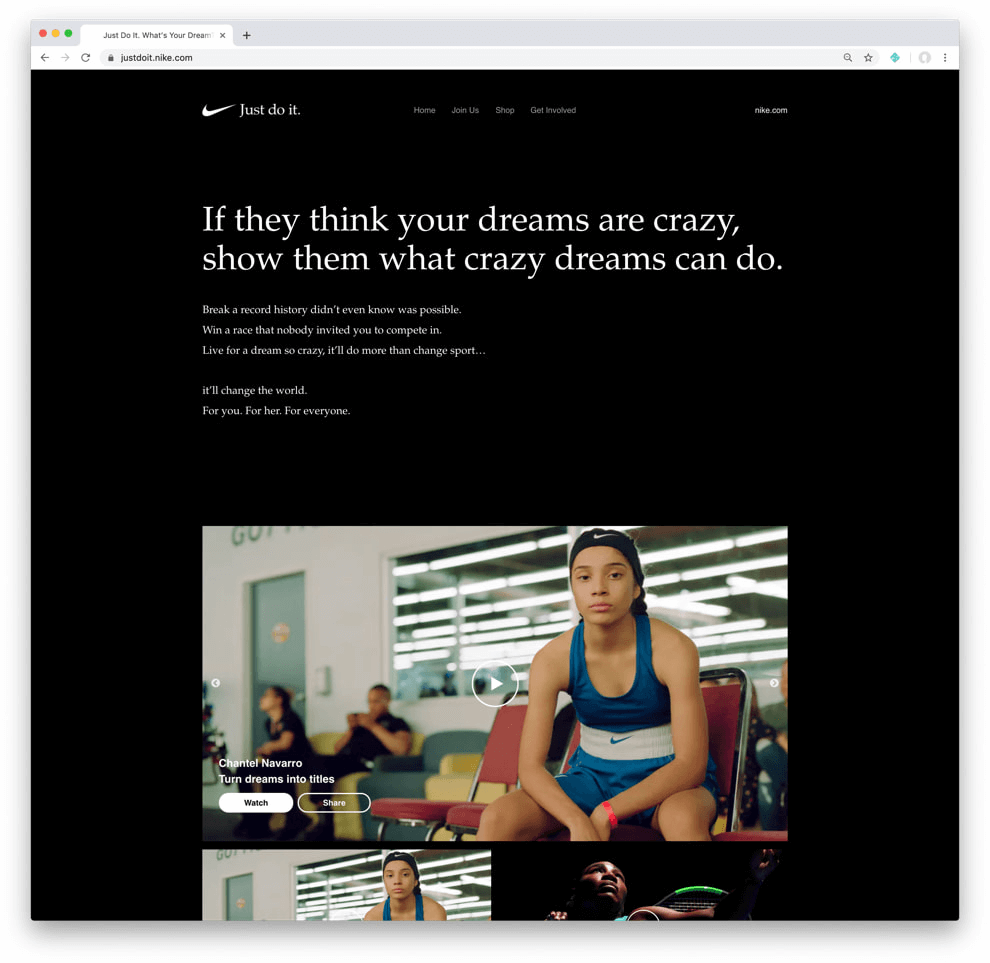
Nike Campaign Website
Nike launched a campaign based website (justdoit.nike.com) that showcased stories from 190,000 users. It was then using Netlify and Netlify CMS.
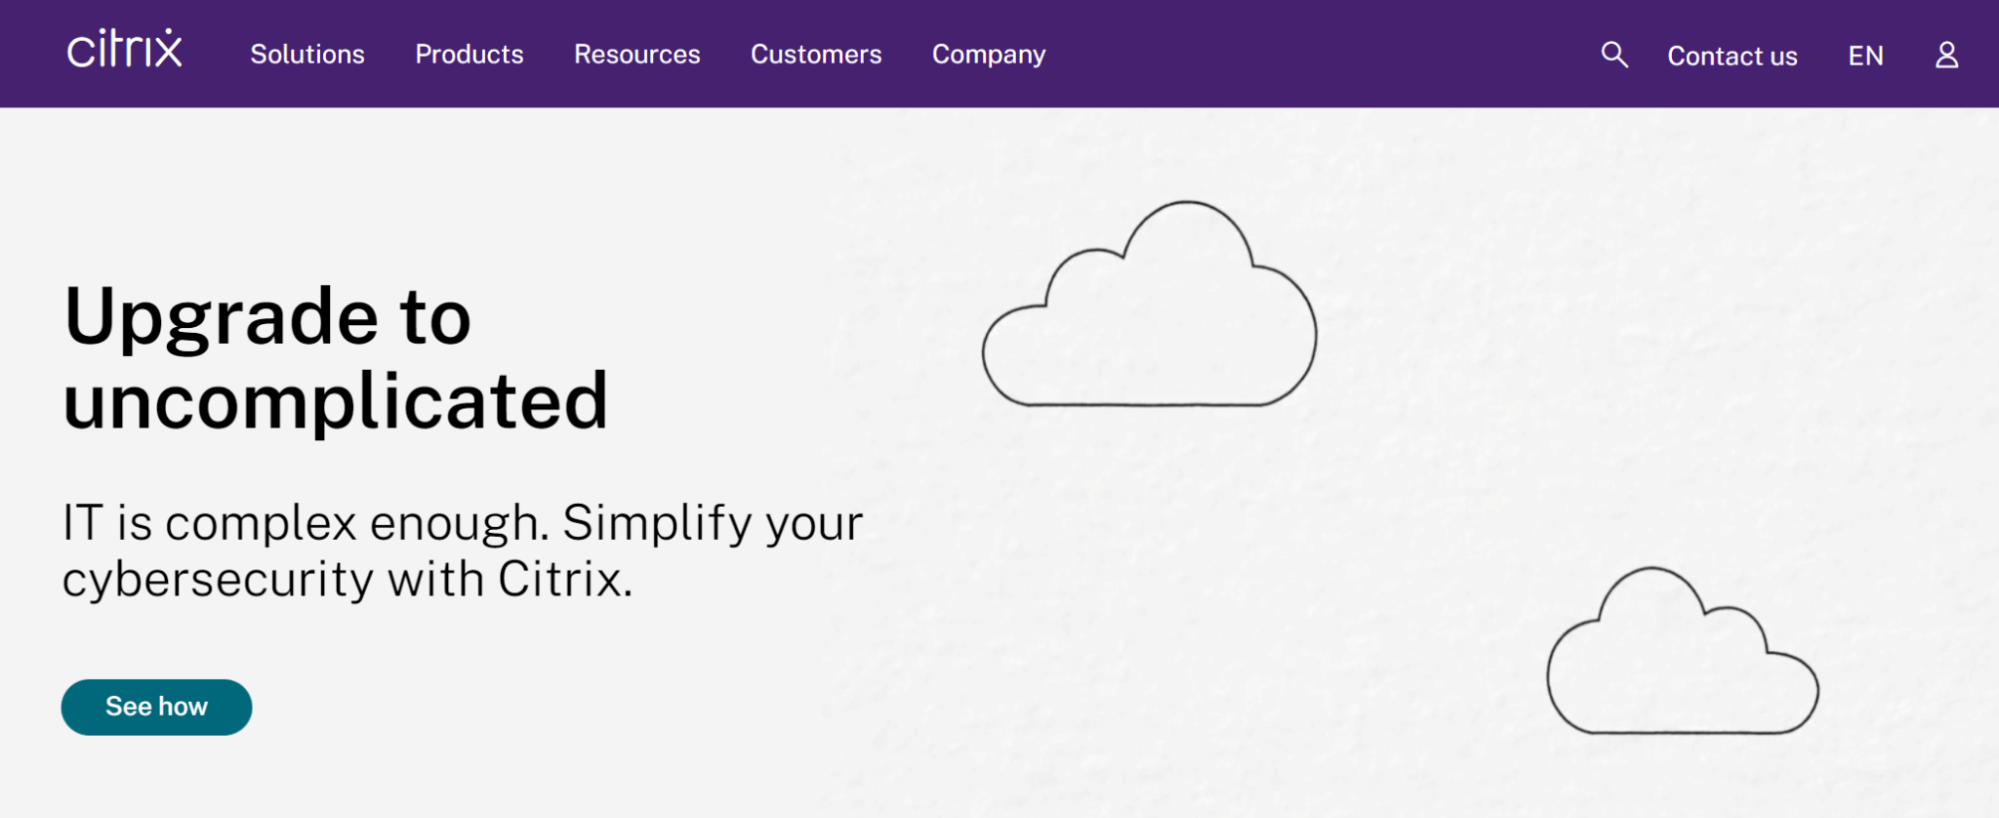
Citrix
Citrix mentioned in the 2018 Jamstack conference that they have migrated to Netlify, which helped them save costs up to 65%.
Now run visual tests for your Netlify sites. Try LambdaTest Now!
Netlify Testing for Different Applications
Alright! Now, we can assume that if you deploy a website on Netlify, you probably don’t need additional guidance on deployment or development. But what about Netlify testing? Even if Netlify makes it super easy to host a website within minutes, is that enough in this competitive world where users have too many options? If your user finds a bug in the website, I am guessing he would treat it like an AWS hosted website or Pythonanywhere hosted website.
So, what are the options we have for Netlify testing?
Did you know what CSS Generated content for pseudo-elements is? The CSS content property is a method of displaying text or an image before or after the given element’s contents using the ::before and ::after pseudo-elements.
Netlify build plugins
The first path we can take for testing Netlify applications is to use Netlify build plugins. These plugins, such as the Cypress build plugin, are available for download through the Netlify UI page. Once these plugins are attached to your repository, you can run them on each build through your version control system.
If there are no plugins that suit your needs, you can always create your own with all the required functionalities. After installation, you need to make a few changes, such as setting up the environment variables or adding the project dependencies. All these steps can be different according to the plugin you are trying to install, and therefore it is recommended to go through the Netlify official documentation once.
Using manual methods
Another approach that a tester can take is to go the manual way and test the web application conventionally. These methods may involve using a personal system, multiple systems or virtual operating systems. So first, you deploy your web application on Netlify using a VCS and then verify any visual defects manually with your team. You may or may not use automation testing for the same, but that would require you to set up the automated connections by yourself.
Apart from this additional infra setup, manual methods do take a lot of time for the testers that could have been used in other activities. A great example would be taking screenshots of the website from various browsers to point out the difference between them. This increases the time gap between testing and application release phases and may continue to increase as the application becomes more complex during Netlify testing.
Another issue in manual testing is the lack of proper tools for the testers to test the application easily and efficiently. With nothing but just a browser and a web application, you may not be able to share your findings or test with corner conditions that are extremely important in today’s competitive era. For example, how much do your elements take to load? Does your element load all at once? What about network conditions and their effect on the application?
In today’s internet age, where there is a new website launched every minute, it is relatively not recommended to go for a manual method. If you add cross browser testing on top of it, the manual may just make things worse than improving them further ahead during Netlify testing.
Cloud platforms
When it comes to efficient web testing, online platforms seem to fit the choice in the best way possible because of various reasons. First, they are an independent infrastructure that does not take any resources from the tester’s system. It does not matter whether you use a 4GB RAM system or a 16GB RAM one as long as you can run the browser.
Secondly, online testing platforms provide tools to facilitate the testing process. They not only help wrap things faster but simplify sharing and organizing of all our findings — For example, taking the screenshots, which we realized was a pain point in manual testing. However, with online tools, you can get multiple screenshots from multiple browsers (or their versions) without opening each of them manually during Netlify testing.
Lastly, online tools are managed by people committed to providing the best platform for a tester. Hence a dedicated team looks after the latest technologies and tools to bring them together after launch. So if you are looking for visual testing on Chrome 80 or Opera 78, you got that with a couple of clicks.
To demonstrate how online tools can help you test better, I will use one of the most popular cloud testing platforms, LambdaTest. Cloud-based cross browser testing tools like LambdaTest allow you to perform manual and automated testing of your Netlify sites over an online browser farm of 3000+ browsers and operating systems.
However, before starting out on the actual visual testing, you can sign up on LambdaTest to continue testing together for better understanding.
When you log into your dashboard, the right panel will indicate three types of visual Netlify testing offered by LambdaTest:
- Screenshot
With this Screenshot Testing Tutorial, you will learn how to perform Automated Screenshot Testing on the LambdaTest platform.
Responsive
Smart
Let’s see each of them briefly.
Screenshot visual testing with LambdaTest
Screenshot visual testing in LambdaTest eliminates the manual work and takes screenshots of up to 25 browsers at once for you to analyze. To perform screenshot testing, enter the screenshot panel and follow the below steps:
1- Select the target operating systems and browsers on which you wish to test.
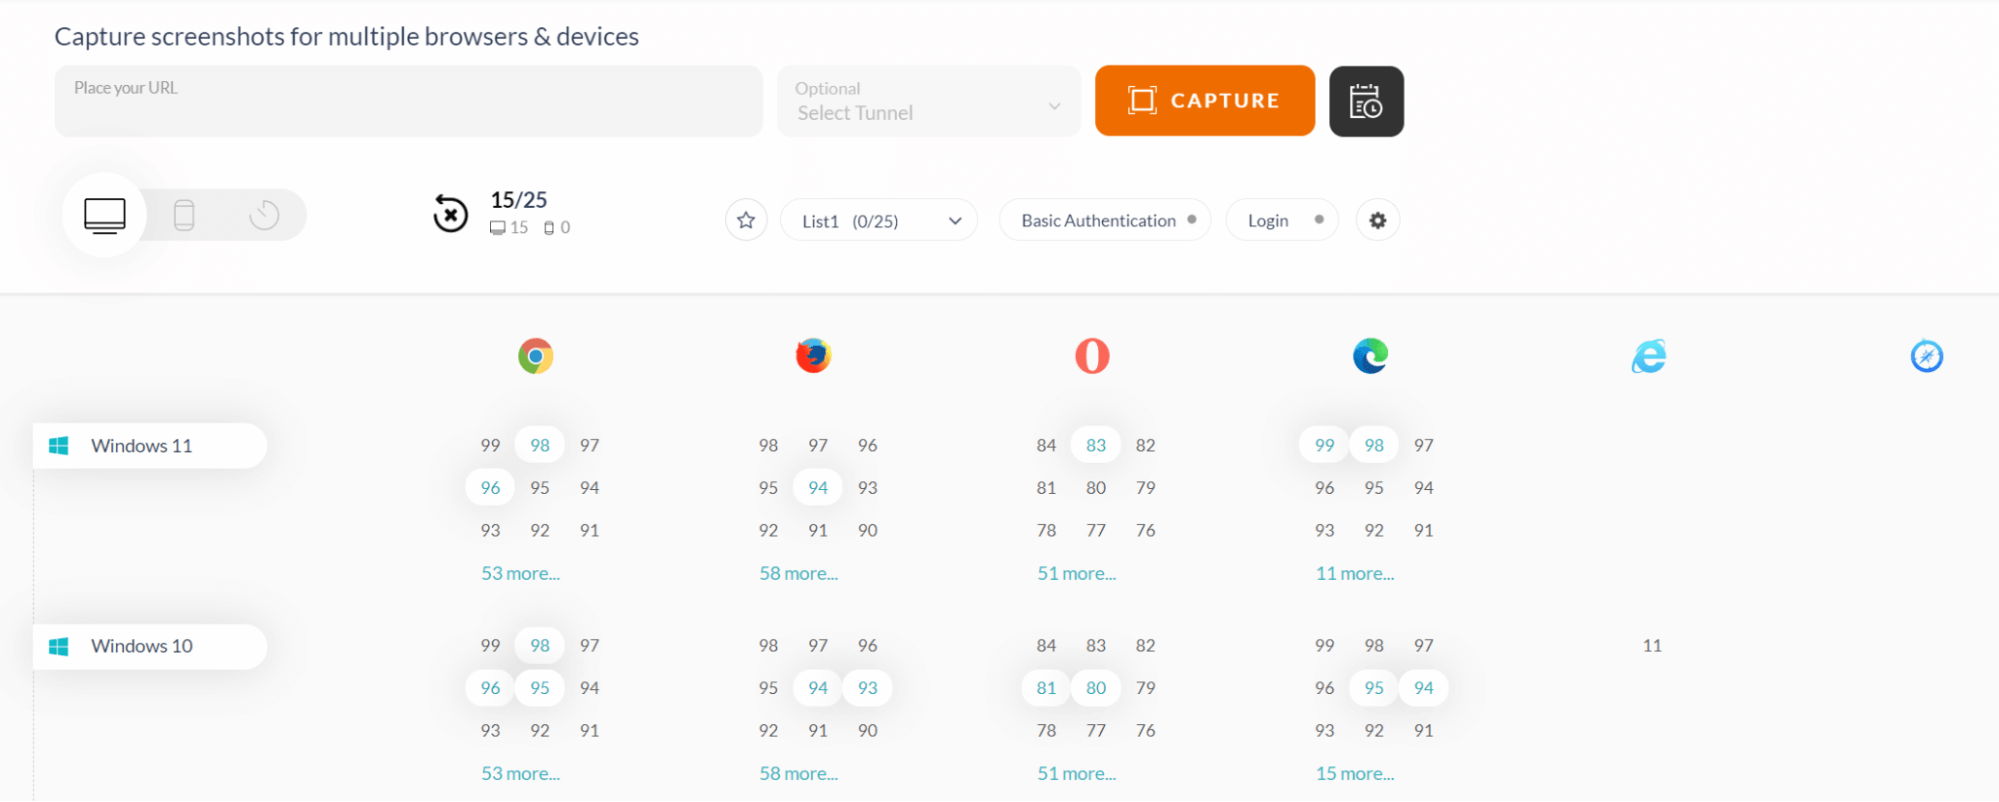
Here I have selected 15 browsers out of 25.
2- Enter the website URL in the input field located above.
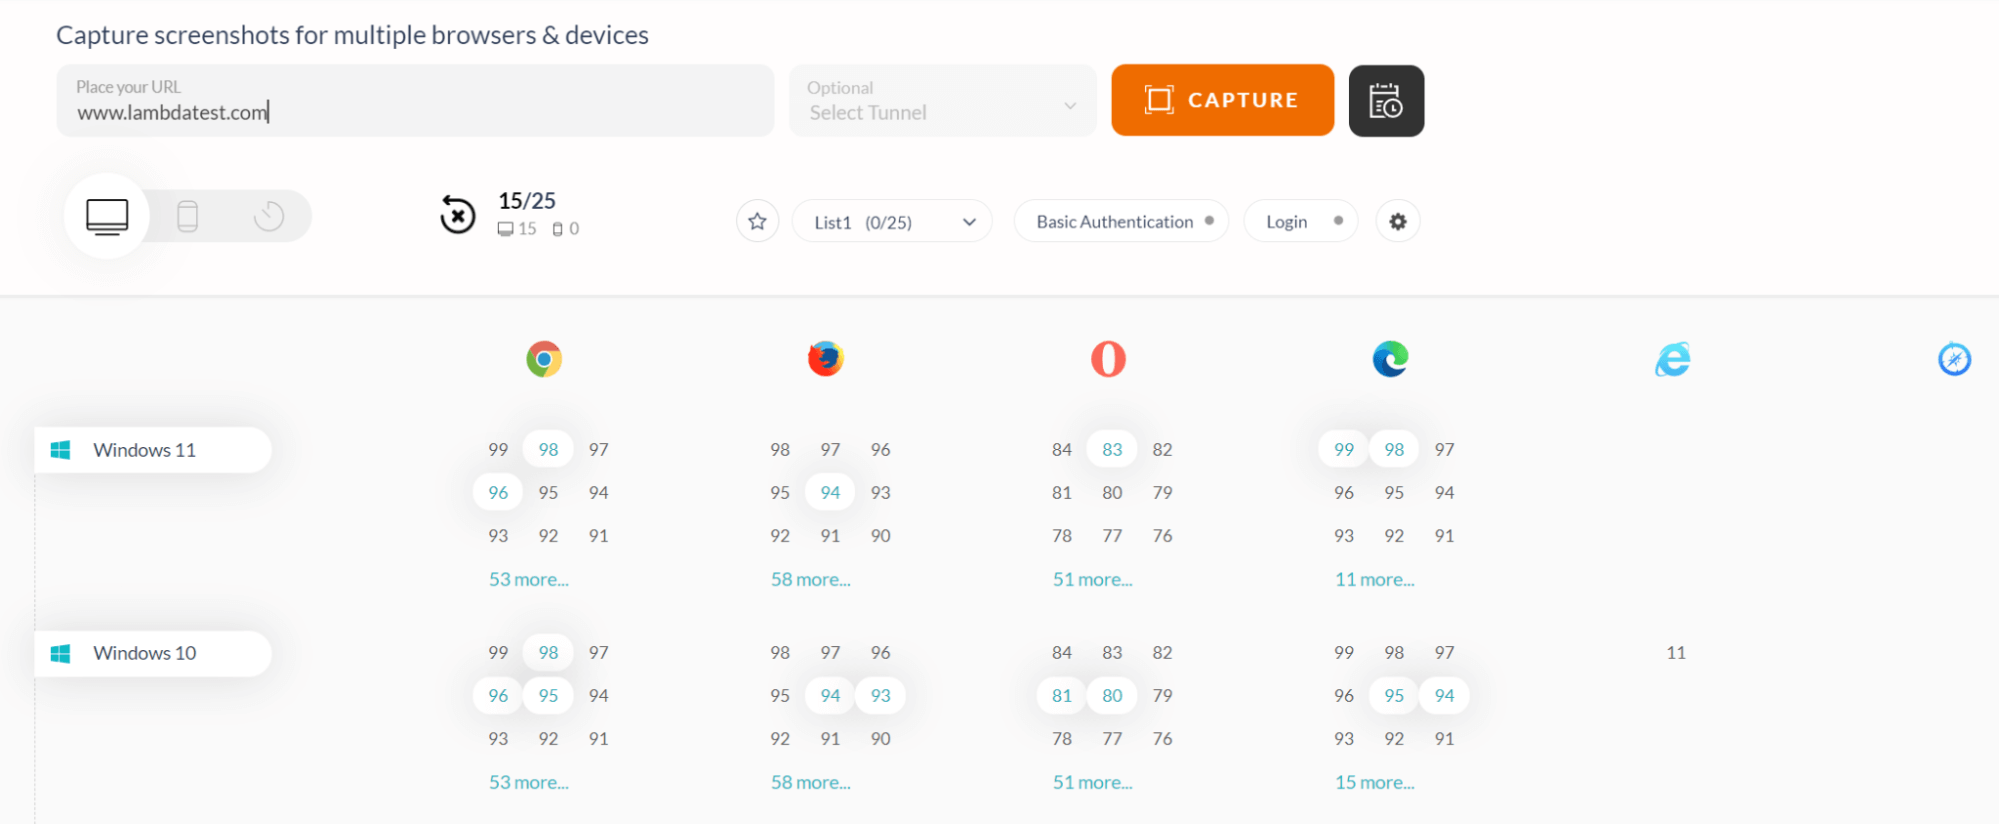
3- Click CAPTURE to capture the screenshots on all the selected browsers.
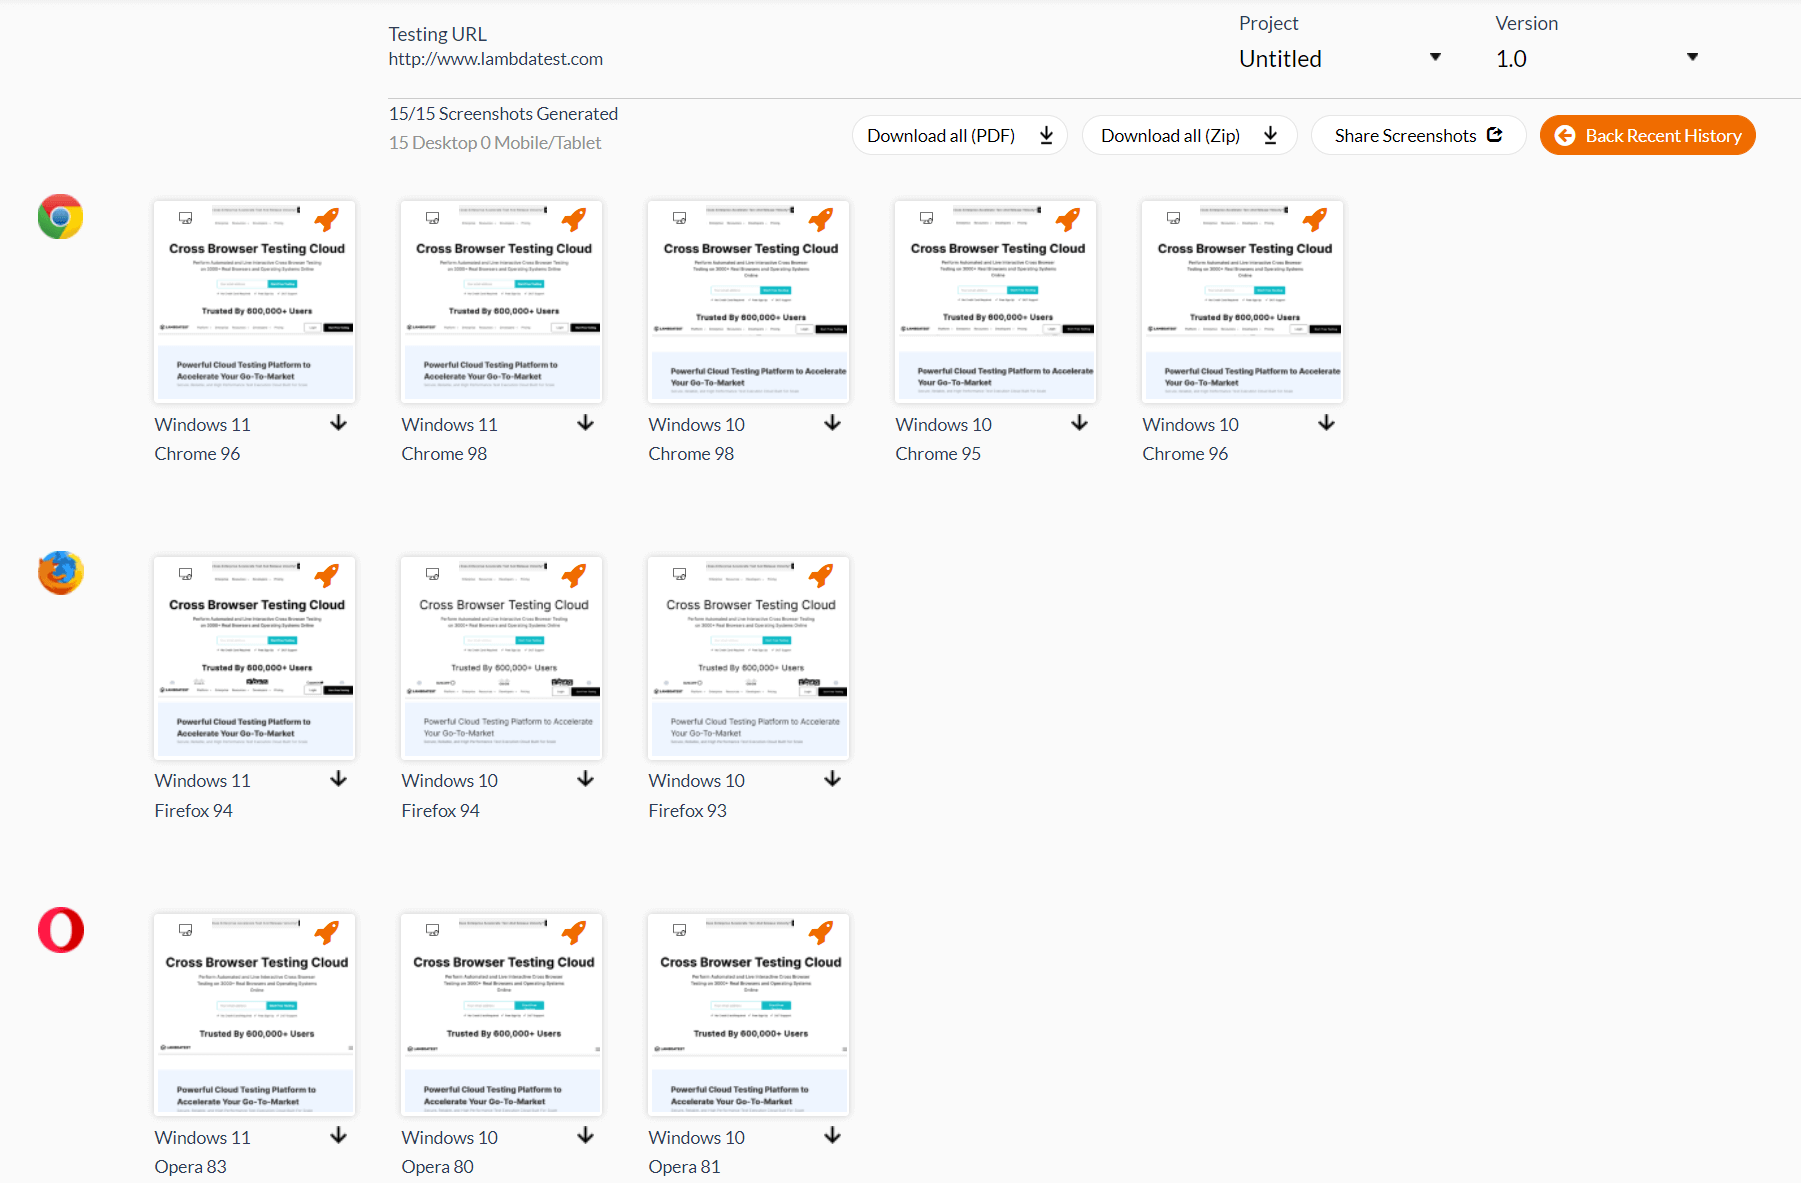
Here the option is available to download all the screenshots in the PDF form, zipped file or share with other members.
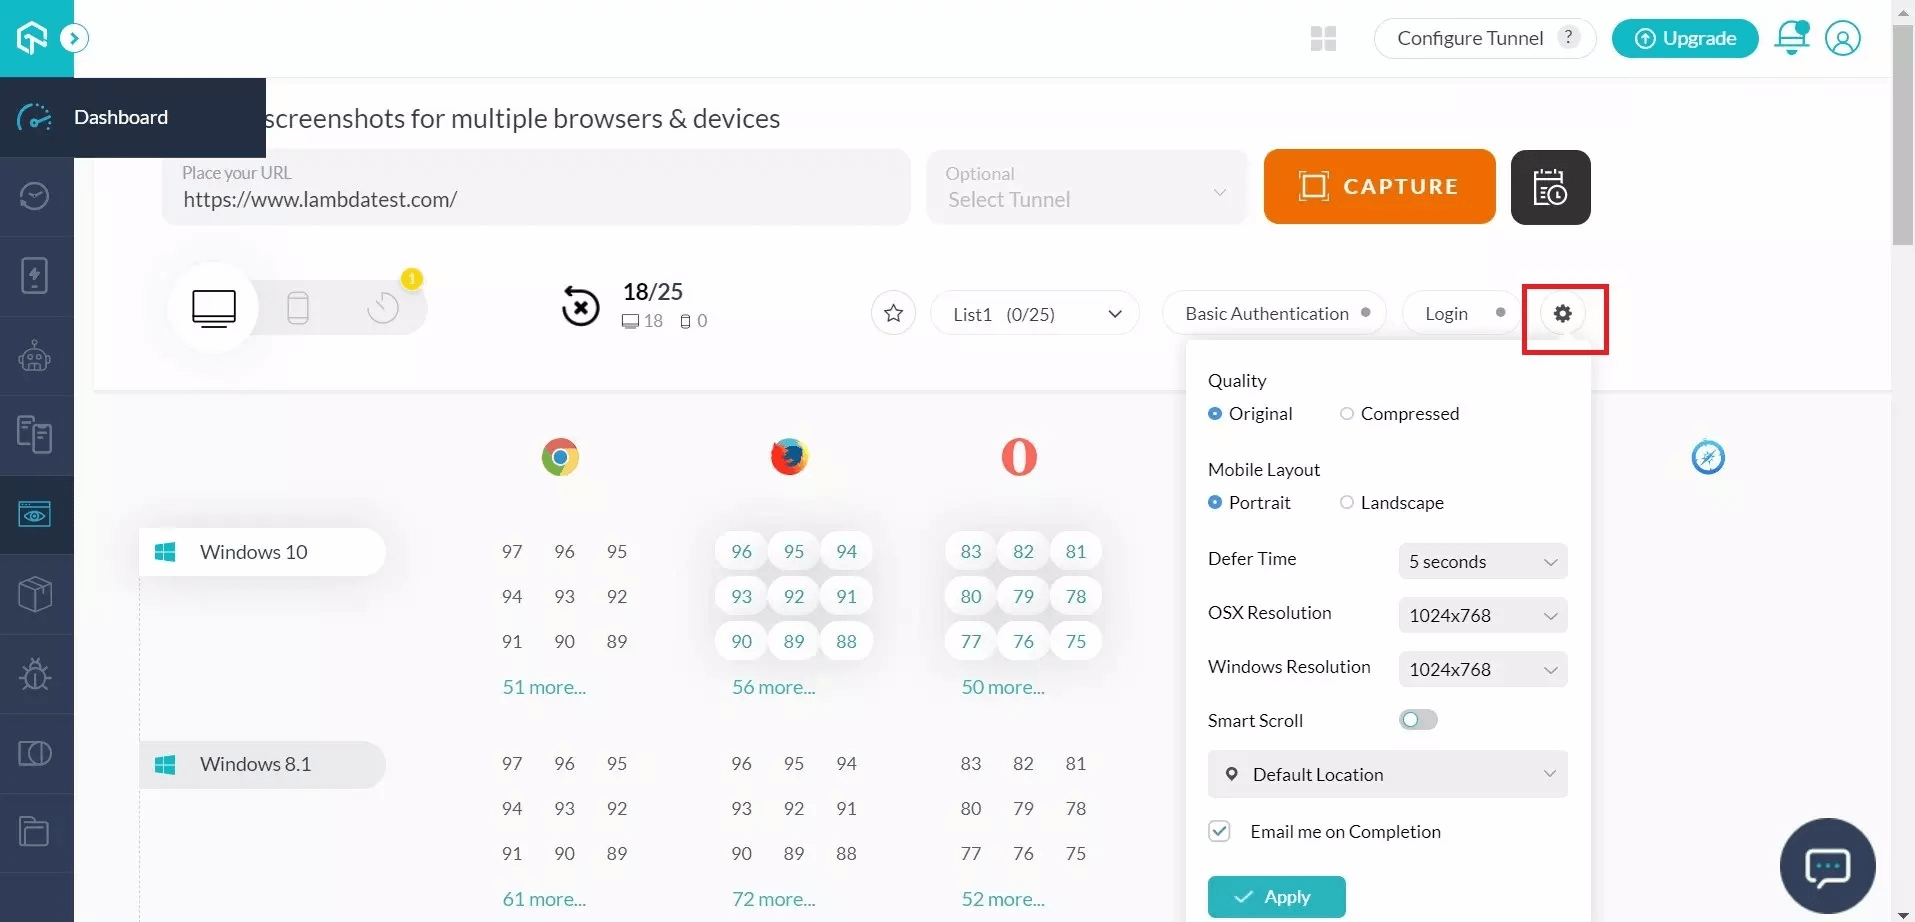
4- You can also change your preferences by clicking the gear icon in the last panel.
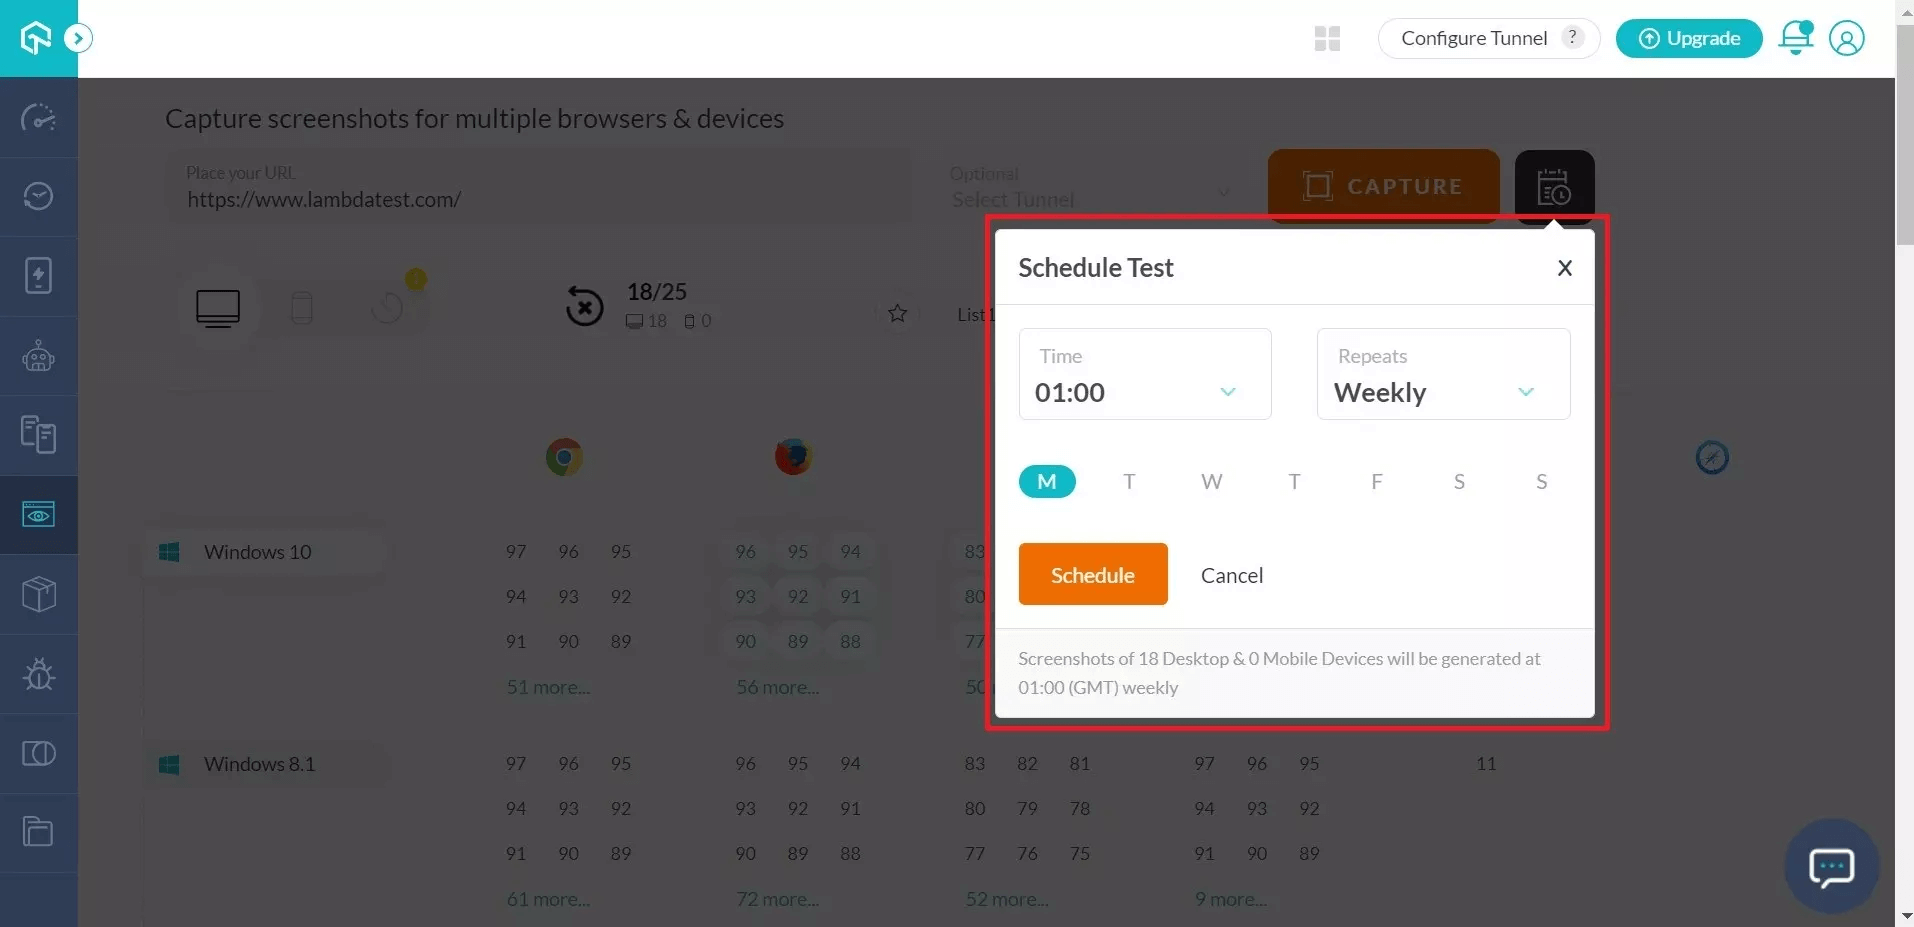
5- If required, screenshots can also be scheduled as per the required frequency, time or day:
Responsive visual testing with LambdaTest
When it comes to visual testing, the responsive character of the application is something you cannot miss out on at all. If your website cannot scale according to the user’s screen, it becomes a severe problem as more than half of the internet traffic is witnessed from mobile devices today.
](https://cdn-images-1.medium.com/max/2006/1*03CwCfq9Bur4Z1-gKcG2rA.png)
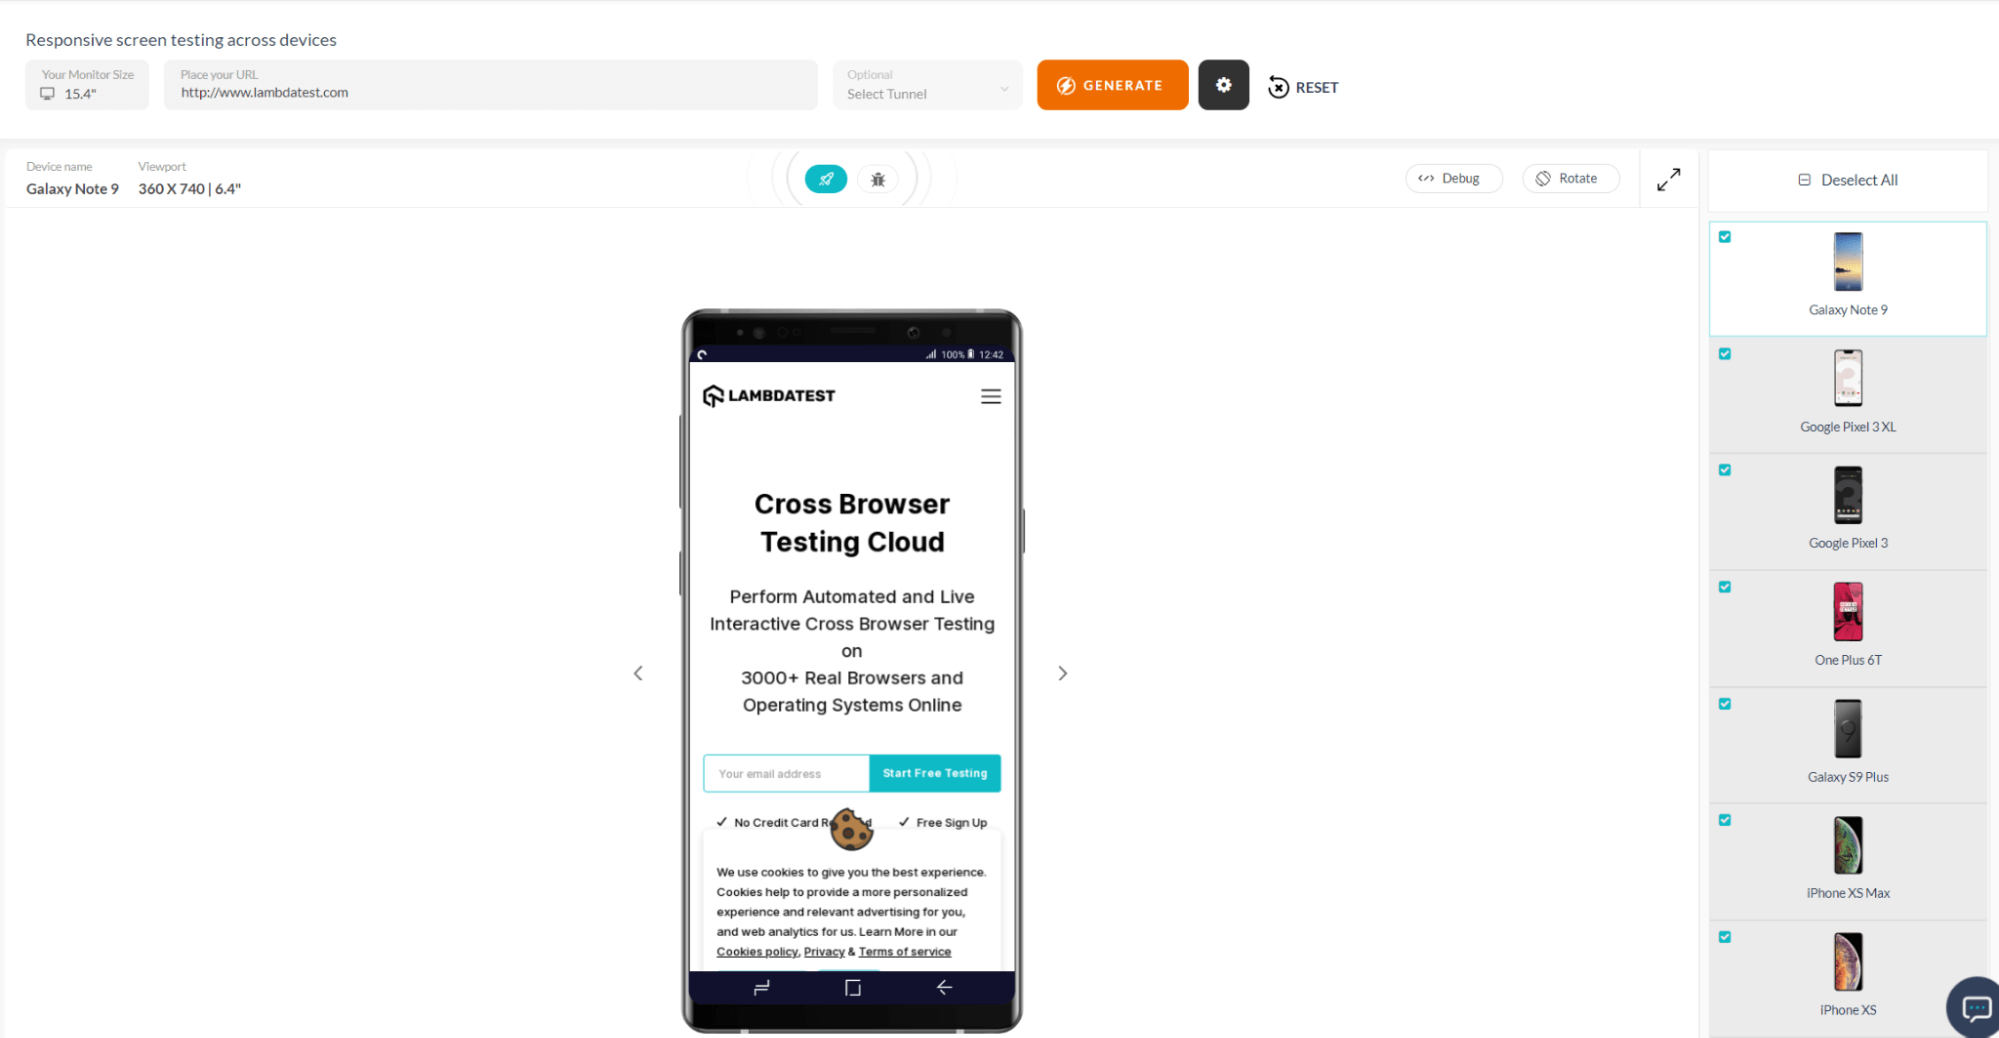
LambdaTest provides an array of mobile devices, and desktop screens (56 in total) already set up for testing purposes. Once the tester enters the URL he wants to test, it gets loaded on each screen and ready to be visualized for any responsive bugs.
Check out our video to learn more about responsive visual testing:
You can subscribe to the LambdaTest YouTube Channel and stay ahead with the latest tutorials around Selenium Testing, Cypress testing, CI/CD, and more.
To perform responsive visual testing, follow the below steps:
1- Click Responsive under the Visual UI Testing drop-down option.
2- Enter the URL and press GENERATE.
Smart visual testing with LambdaTest
One of the most unique and helpful features for visual UI testing in LambdaTest is Smart visual testing. Smart visual testing aims at pinpointing the differences between two images, such as icon size, color, text etc.
It comes in handy when you can overlook the subtle differences when you perform testing manually.
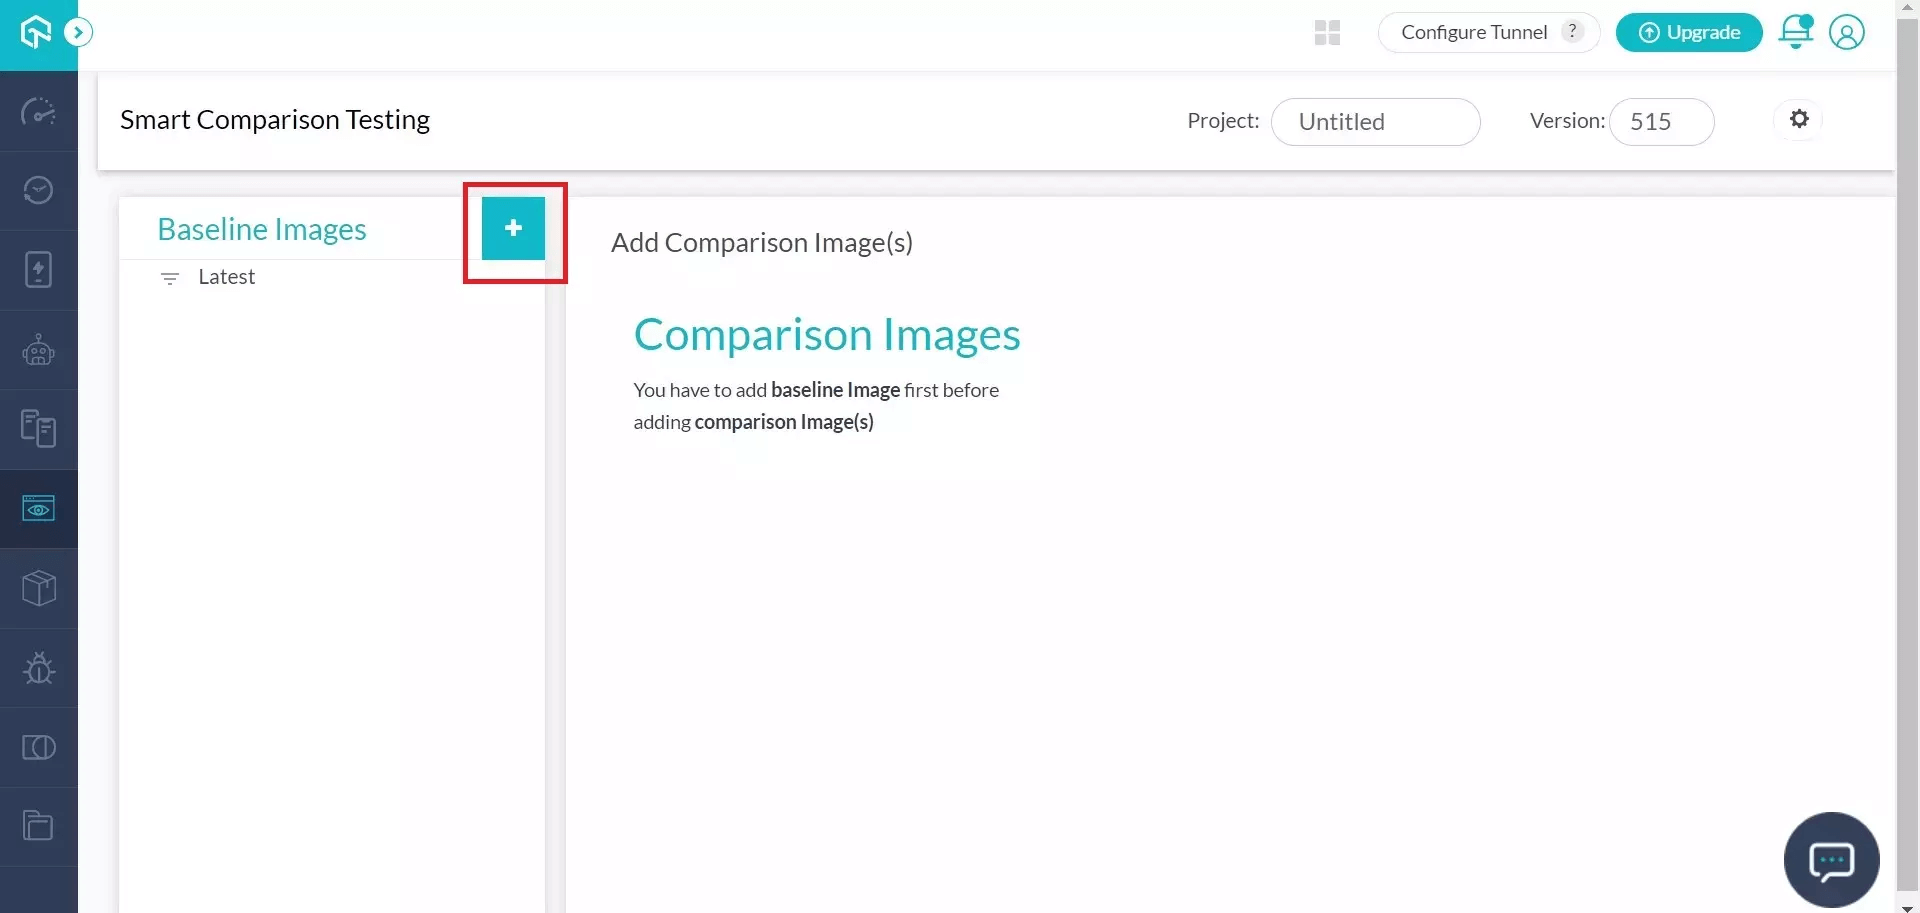
To perform smart visual testing, follow the below steps.
1- Upload a baseline image by clicking on the “+” icon to perform smart visual testing. This image will work as a reference to point out the difference from other images.
2- Next, upload the comparison image by clicking Upload Comparison Image.
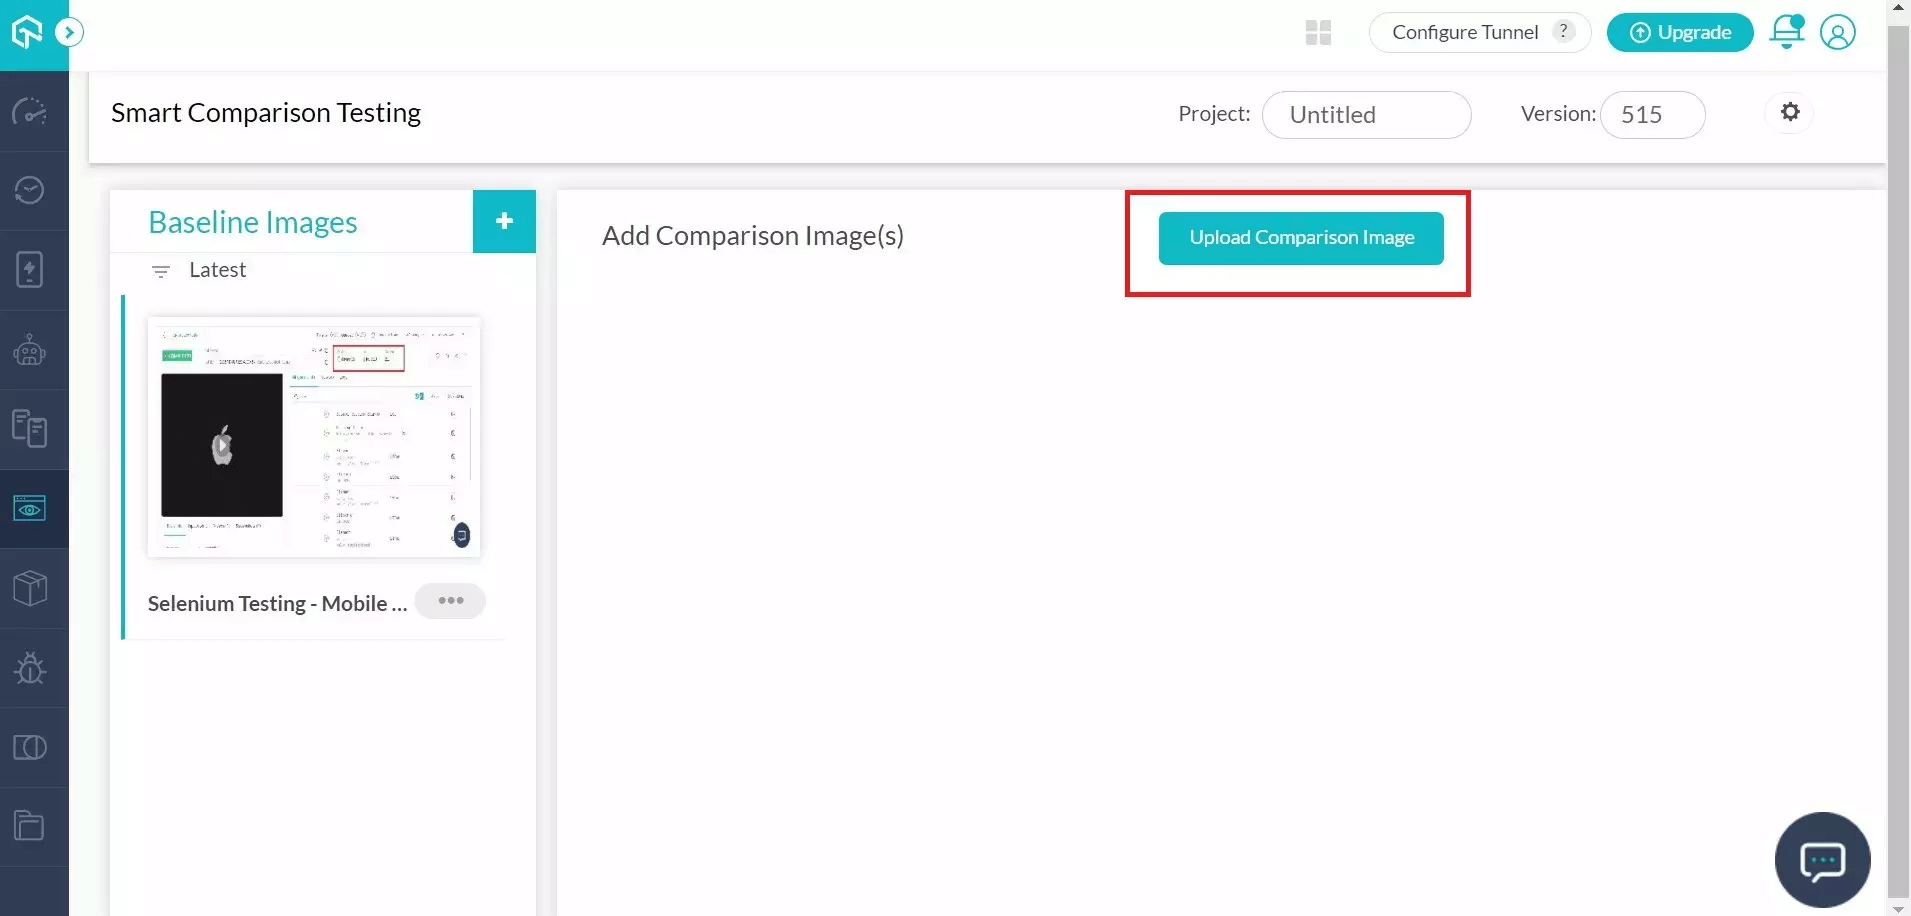
You can also upload multiple baseline and comparison images.
3- Now click on the Run button available on the comparison image.
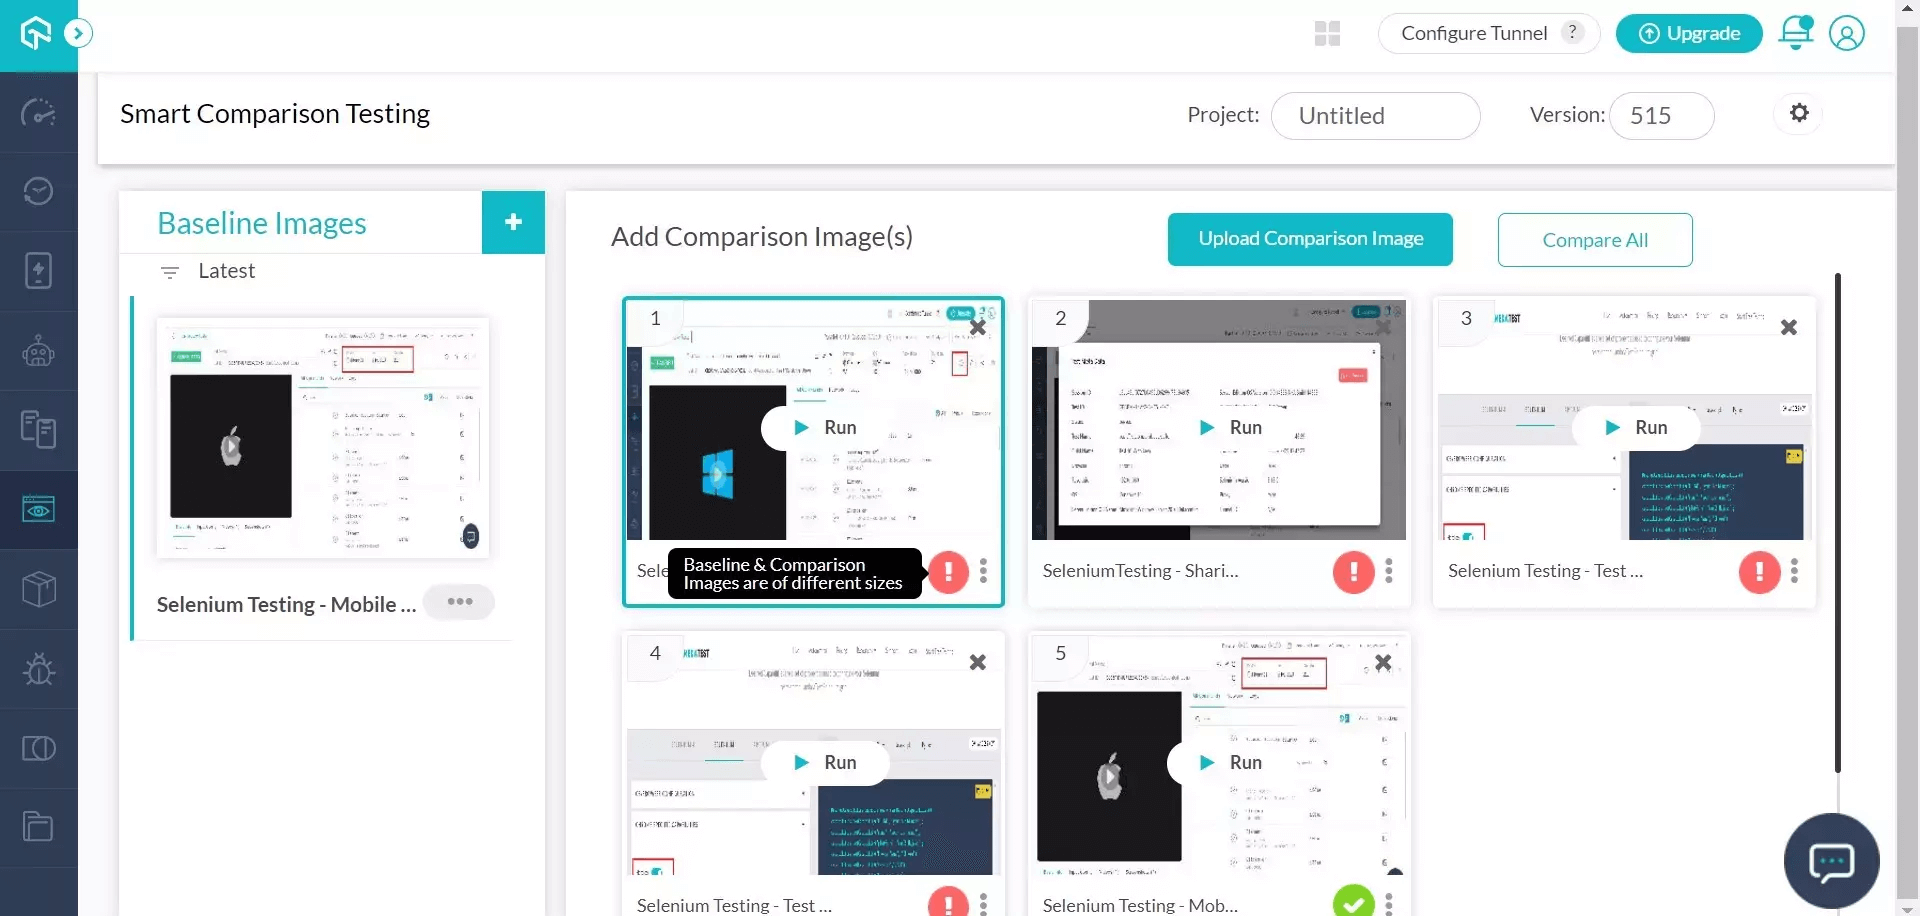
4- When the comparison is successfully run, a View Issues button is available on the images as follows.

This will display all the issues in the comparison image compared to the baseline image.
Want to explore Smart visual testing? Try LambdaTest Now!
Did you know? The CSS grid introduces a layout mechanism for CSS, CSS Grid Layout (level 1). It’s main purpose is to provide authors with a mechanism for dividing available space for layout into columns and rows using predictable sizing behaviors. Thanks to the various properties offered by the CSS grid, you can easily display content in grids that were previously difficult to achieve.
Your Netlify testing experience
Netlify brings changes to the web application deployment process beyond imagination. Deploying a static website within seconds without worrying about the server-based configuration is a dream for developers. However, just website deployment does not finish our work. The main task to focus on after the deployment is testing the website for any visual defects on various browsers, operating systems and devices.
In this post, we covered three methods to accomplish this task. The first method, Netlify plugins, can run your tests on each build once connected with the repo. But Netlify plugins have been mostly developed for end-to-end testing processes for testing the application’s functionality. For visual testing, you might have to build your UI testing plugin (if possible) because of the involvement of the visual element. This requirement brings us to the second option of using everything through manual means if it is your system or automation frameworks.
The last option, the recommended method, is to use online tools for visual layout testing. Online Visual testing platforms like LambdaTest not only provide relief to your local resources but are advanced, maintained and always up-to-date. When you launch a new browser, it is made available simultaneously on the cloud platform with the previous versions. This speeds up the work and provides us with a secure platform, and facilitates testing with additional functionalities.
But that could ultimately be my point of view on Netlify testing from my flauntable experience as a developer and tester. We would like to hear about your views on the same in the comment section below. This can help the community choose the best Netlify testing method for their Netlify built website. I hope this post helps you in your next or current projects.
Happy Netlify testing!